Tutorial: Make a Watermelon Whale!
Summer is definitely here and fresh, cold watermelon is a favorite summer indulgence over here at ATX DIY Headquarters. These long, hot days remind me of growing up in California’s Central Valley (although the humidity of Central Texas is something that I’m still becoming accustomed to). My favorite way to serve watermelon is to make a watermelon whale. For me, it’s always a nostalgic project – my mom made watermelon whales for summertime family gatherings. It’s a tradition that I’m happy to carry on and share with y’all.
Making a watermelon whale is no more difficult than carving a pumpkin. Follow these simple steps to make your summer a little sweeter:
1. At the store, select a watermelon that is vaguely whale shaped (oval) and one that rests well on one side.
2. Materials and Tools:
You will need:
- A watermelon
- A big cutting board
- A large bowl
- A sharp, medium sized knife
- A spoon
- A dry erase marker (preferably green)
- A couple towels (that you don’t mind getting watermelon juice on)
- A colander
- A few toothpicks
- 1 sprig of mint
- 2 blueberries
3. Wash the outside of the melon with soap and water. Dry it thoroughly.
Begin marking the outline of the whale shape on the melon with the dry erase marker. See the following few images to get a better idea of what shape to draw.
4. Draw the whale’s tail on the end opposite the head.

5. From above, your whale should look something like this (look at the next image to see how the head and tail shapes connect along the sides):

6. Begin cutting by gently scoring the melon in the area in between head and the tail. Don’t cut too deeply – if the melon is really ripe, it may split a little, scoring a few cuts in the rind helps to take the pressure off.

7. Continue cutting, following along the outline of the whale. Be extra careful when cutting the inside curve of the whale’s tale – start by cutting a very shallow cut and continue over the same line going slightly deeper each time.

8. Once you’ve cut along all of the outlines, you can begin taking out the rind in the non-whale sections of the melon.

9. Remove segments of the rind one piece at a time. Don’t worry about the flesh inside the melon, you’ll scoop it out once you’ve cut away all the unwanted rind.

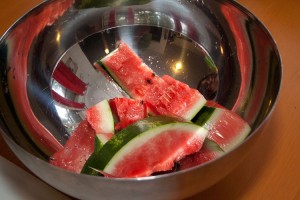
10. Save all the pieces of rind and fruit in the large bowl.
11. Once you’ve sliced out all of the rind, you’re whale should look something like this:
12. Carefully scoop out all of the flesh inside of the melon. Try to scoop the flesh out in big chunks and leave enough flesh on the rind so that the melon supports itself (this is a lot like scooping out the inside of a pumpkin). Add the fruit to the bowl.
13. While you’re scooping out the fruit, take a few minutes to de-seed and cut the melon into bite sized pieces. Keep some towels close at hand as watermelon juice tends to get everywhere while you’re scooping and cutting!

14. Drain the watermelon pieces in a colander so that you’re whale isn’t full of juice when you fill it back up. This is particularly important if you’re making a fruit salad with other fruit.

15. Once your whale is all scooped out, it should look like this:

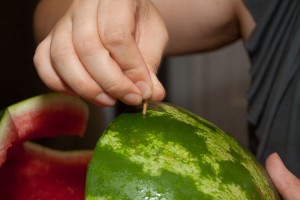
16. Now you’re ready to add a blow hole! Take a toothpick and poke a hole into the top of the whale’s head.
17. Poke a sprig of mint into the blow hole.

18. Now help the whale see by giving it eyes. Break a toothpick in half – stick the pointy end of the toothpick into the side of the whale’s head, leaving a quarter inch or so of toothpick sticking out.

19. Carefully poke a blueberry onto the toothpick. Repeat for other eye.

20. Now your watermelon whale is ready to swim! Fill it up with the prepared watermelon or your favorite fruit salad. Enjoy!

Browse Timeline
- (older) Tutorial: Sew a Simple Circuit
- (newer) East Austin Studio Tour: EAST2010


