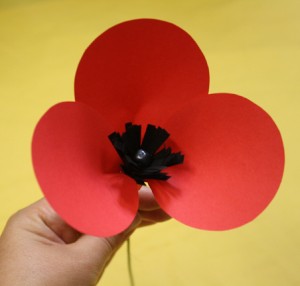
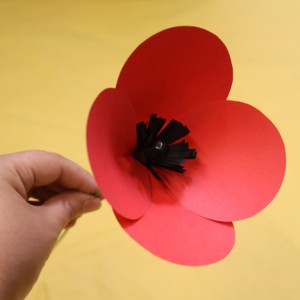
Paper Poppy Tutorial
It’s too hot and dry (is “droughty” a word?) for real flowers, so I made some paper poppies instead. They’re pretty simple and incredibly cheerful – make some yourself!
I made the first batch using vellum for the petals and scrapbooking cardstock for the stamen. For the one I made to craft this tutorial, I used pretty basic printer paper.
Materials and Tools:
- Paper for the petals (1 sheet of 8.5″ x 11″ paper makes 2 poppies)
- Paper for the stamen (usually black, yellow, or orange)
- Floral wire (18 or 20 gauge works well)
- Floral tape (the same color as your floral wire)
- A bead (the same color as your stamen paper)
- Thin wire (I used 28 gauge jewelry wire)
- Pencil
- Scissors
- Hot glue gun (& glue sticks)
- Needle nose pliers (with wire cutters)
- Paper Poppies Template (downloaded and printed out): paperpoppiestemplate
Steps:
1) If you haven’t already, download and print out the Paper Poppies Template by clicking the link in the Supplies list. Cut out the Petal and Stamen templates – you’ll trace them shortly!
2) Fold your petal paper into eights, so that it looks like this picture:
3) Trace the petal template onto one piece of the folder paper:
4) Cut out the petal shape through four layers of your paper. These will be the four petals for your first poppy! There should be enough petal paper left to make four more petals.
Trace and cut the stamen template out of your other sheet of paper. You should now have four petals and one stamen:
We’re just getting started… keep reading this post for the rest of the tutorial!
5) Snip the stamen so that it is fringed. Right now, the stamen is just a strip of paper that’s 11″ long and 1.5″ tall. With your scissors, snip down about 1″ every 1/4″ or so. Don’t cut all the way through the paper!
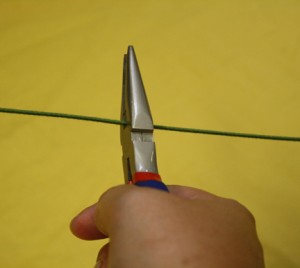
6) Cut a length of floral wire so that’s it’s about 9″ long. (Hint: the green thread covering my floral wire started to fray, so I dabbed a bit of hot glue at each end to hold it to the wire):
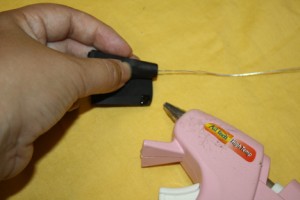
7) Take your bead and about 12″ of the thin wire. Thread the bead onto the middle of the wire, fold the wire down on either side of the bead, and twist the wire around itself:
8) Starting with one end of your (now fringed) stamen, glue the bead and wire onto the stamen:
9) Roll the stamen paper around the bead and wire tightly:
10) Put a dab of hot glue at the end of the roll and wrap it up:
11) Put a liberal blob of hot glue on the base of the wrapped up stamen so it doesn’t unravel:
12) Stick one end of your floral wire into the base of the stamen (you may need to apply a new dab of glue):
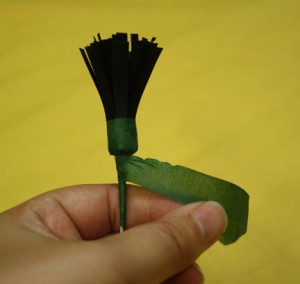
13) Cut a 12″ (or so) long piece of floral tape and wrap it around the floral wire, an inch or so below the base of the stamen. Wrap the tape tightly, twisting and stretching it around the wires, pressing the tape into itself (floral tape isn’t really adhesive, it’s waxy, so you need to press and stretch it into itself to make it stick to itself). Wrap it up and around the base of the stamen:
14) Now, put the stamen down. Take your petals and pinch a crease along the middle of the tab on the petal, like so:
15) Snip a little cut (about 1/2″) at the base of each petal, along the crease you made:
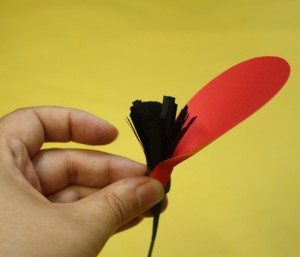
16) Put a spot of hot glue on the stamen right near where the floral tape ends, and glue your first petal to the stamen and stem. You can use the two sides of the slit to glue around the stem more solidly:
17) Glue the second petal directly across from the first petal:
18) Attach the third petal between the first two petals, by gluing it underneath the other petals:
19) And now the fourth petal:
20) Get another piece of floral tape and wrap the stem up to the base of the flower:
21) Wrap the tape around the base of the poppy covering up all the gluey, cut ends. Make it pretty and cut off any excess floral tape:
22) Tada!
Browse Timeline
- (older) Good Luck to The Joiner’s Apprentice
- (newer) Attributes of Creativity
Comments ( 1 Comment )
Very pretty. Did you show Jen…maybe in pale blue for aisle decorations.


